Mike_Z
Veteran Member
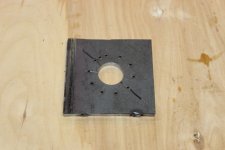
Recently, I dragged out my SOL-20 terminal and brought it back to life. Although the computer seems to work well, by the way, thanks for the help, I only have about a dozen and a half 5 1/4" 10 hard sector disks. Some of them have bad spots on them and I can only use part of those disks. I have installed Mike Douglas's VSG and it works great. Yet I still wanted to investigate getting more Hard sector disks. Looking over the internet I found some Vintage Computer threads about converting 360 Kb soft sector disks to hard. After a couple of conversations with Al Kossow, the thought of attempting to make a hard sector gelled in my mind. Al gave me some fodder to start with and my metal stock material was looked at. It started with cutting two 4 x 4 inch by 1/4" thick squares. They were welded together, so that when they were drilled, the holes would absolutely match. A little measuring of a disk dictated the hole pattern which was laid out on the top plate. I found some 0.096" round stock to use as the punch pin, so the plate holes were drilled as 0.098" a #40 drill and a center hole

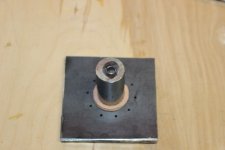
at 1 1/8". The bottom plate was fitted with 1 1/8" round rod. The idea here is that a soft sector disk would be squeezed between these plates.

Then a leather washer was placed over the center rod. This is to hold the media in place and allow the envelope to rotate. There is also a leather washer on the top plate.

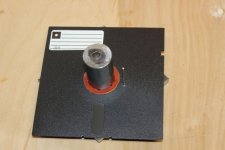
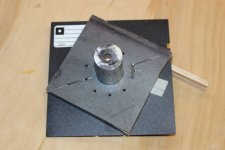
The punch pin is placed in the bottom plate, the disk is placed over the rod, with the punch pin through the index hole. The top plate is placed over this and clamped in place. I have yet to make a good clamping device, but with a temporary clamp, the punch pin is removed from the plates, which allows envelope to

rotate. A piece of tape with a mark on it is aligned with punch hole scribe mark. This places the envelope hole between the punch holes. With the punch placed on a good support, I punched a hole, rotated the envelope and punched another hole, continued until all the holes were punched. When I inspected the disk, each hole had a hanging Chad. The punch pin cut a nice clean 99% hole, but would not completely punch the hole. To complete the hole a tweezers and Exacto knife removed the Chad. I may try to make a hollow point punch pin later, along with a better clamp setup. Next came the testing of the newly made hard sector disk. This disk formatted, copied files and ran them all just fine. I ran the North Star DT for an hour with no errors. A little more work and this thing maybe a handy tool. Thanks, Mike.

at 1 1/8". The bottom plate was fitted with 1 1/8" round rod. The idea here is that a soft sector disk would be squeezed between these plates.

Then a leather washer was placed over the center rod. This is to hold the media in place and allow the envelope to rotate. There is also a leather washer on the top plate.

The punch pin is placed in the bottom plate, the disk is placed over the rod, with the punch pin through the index hole. The top plate is placed over this and clamped in place. I have yet to make a good clamping device, but with a temporary clamp, the punch pin is removed from the plates, which allows envelope to

rotate. A piece of tape with a mark on it is aligned with punch hole scribe mark. This places the envelope hole between the punch holes. With the punch placed on a good support, I punched a hole, rotated the envelope and punched another hole, continued until all the holes were punched. When I inspected the disk, each hole had a hanging Chad. The punch pin cut a nice clean 99% hole, but would not completely punch the hole. To complete the hole a tweezers and Exacto knife removed the Chad. I may try to make a hollow point punch pin later, along with a better clamp setup. Next came the testing of the newly made hard sector disk. This disk formatted, copied files and ran them all just fine. I ran the North Star DT for an hour with no errors. A little more work and this thing maybe a handy tool. Thanks, Mike.
